
DavinciResolve Interface (THE MEDIA PAGES)
- Piseth POV
- May 10, 2019
- 3 min read

Updated: Apr 13, 2020

The Workflow Goes Left to Right

Media Page: This is where you will start on. This is for gathering your material into DaVinci.
Edit Page: You can edit your footage and add transitions or do some animation, if you want to.
Fustion Pages: Working for compositing and effect.
The Color page is for making your color grade.
Fairlight Page: Working with sound mixing.
Deliver Page: is for finishing, rendering and exporting your finished grade.
THE MEDIA PAGES
The Media Page is your go-to place for importing and organizing all your media in DaVinci Resolve. It’s the most efficient place to organize all your videos, audio, sync files, add metadata, and even clone your original files. The Media Page itself is divided into five areas: The Library Browser is where you navigate and search files you need for your project. The Media Pool is where you can organize all your files into bins, rename files, arrange them based on metadata, and create Smart Bins, which organize your files based on metadata that you define. The Viewer, as the name implies, is where you preview your files before you import them or when they’re imported. The other panels in the Edit Page also include the Meters, Waveform, and Metadata Panel.
Browser
This is where you’ll navigate your media drives to find your footage, music, stills, and so forth. Resolve’s interface is very user-friendly, and you’ll find that if you need extra space to view the panel, 95 percent of the time, you can extend it by either hitting the “panel extension button” here . . . .
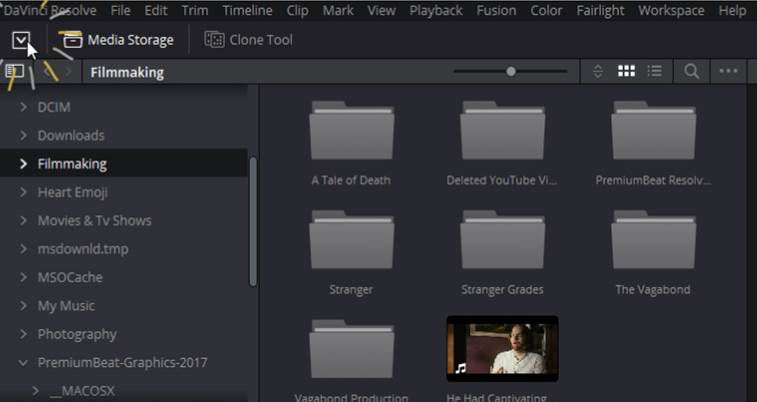
... or by dragging the panel edge. To say there aren’t many ways to import your footage would be an understatement, and you may think that it’s a bit ridiculous, but you’ll be surprised at how useful each method is.

Import The Media
There are couple way to import media into Davinci Resolve .
Drag and Drop
Right Click à Add into Media Pool


When you create the project you need to know clearly about your project information.
Why would I say this?
Because your project will goes wrong way. For example your project shoot at 25fps and you don’t know the info. You just create project at 50fps it will be wrong.
You need to setup first all the information base on your project into project setting panel as you see the image in the right side.
Such as:
Timeline Resolution
Pixel aspect Ratio
Timeline Frame rate
Video monitoring
And so on.
Maybe you will do more than that depending on your project!

After you setting up your project setting, it’s time to import all you material.
There are some message that you need to know before your media go into Resolve. It’s the same Idea in premiere about footage setting and sequence setting.
Resolve say about the different frame rate between footages frame rate and frame rate when you setting up in the project setting. He ask, Do you would like to change your mind or not?
Change, It’s mean that you change your project frame rate to adapt with your video frame rate.
Don’t Change, It’s mean that you adapt you video frame rate to the project setting.

After
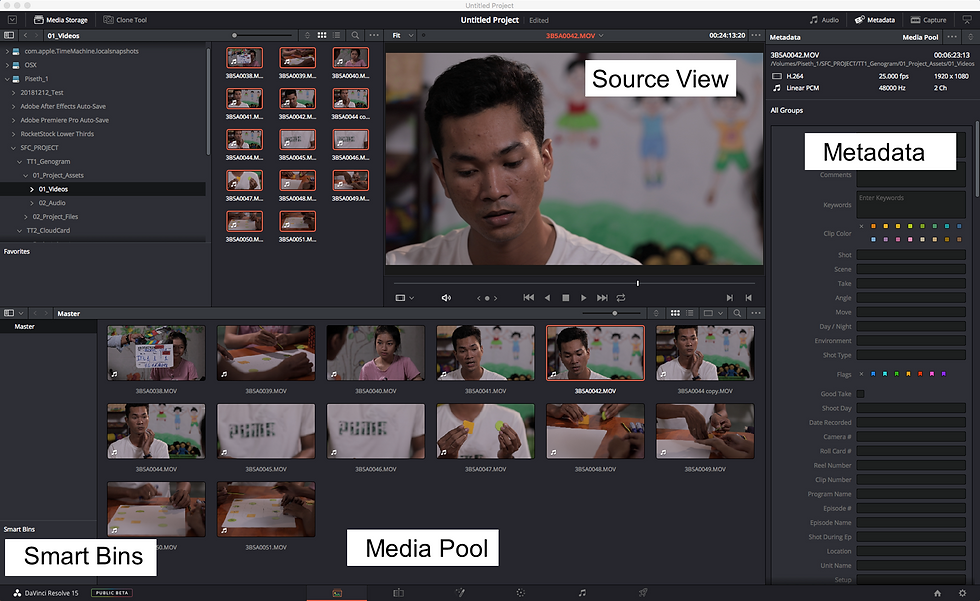
Media Pool is the panel where your Rushes store.
Source View is the panel for viewing the selected clip.
Metadata is where you can see clip information and adding some mark on the selected clip.
Smart Bins is the place where you can short your media or timeline you need only.


Comments